
- OBJECTIVE:
- To lay down the procedure for operation of Auto titrator.
- SCOPE:
- This SOP is applicable to the procedure for Operation of Auto titrator at {Company Name} {Location}.
- RESPONSIBILITY:
- Officer/Executive/Designee Quality Control – Shall be responsible for operation as per SOP.
- Head/Designee Quality Control – Shall be responsible for ensuring compliance as per SOP.
- ACCOUNTABILITY:
- QA Head shall be Accountable for implementation of SOP.
- PROCEDURE:
- Ensure that the electric and cable connections are properly connected.
- Switch on the instrument(s), computer and printer.
- Wait for 5 – 10 minutes for instrument stabilization.
- Fix or replace the exchange unit with required titrant burette tip(siphon) in the reagent bottle and fix the drying tube to siphon.
- Connect the required electrode(s).
- Double click on PC Control; pc control main window will appears on the screen.
- Rinsing the burette:
- Click ‘manual’ icon, in PC control main window, the ‘Manual control’ window appears on the screen.
- Click on ‘Dosing’ and select the appropriate ‘Dosing dev’.
- Click the ‘Dosing fixed volume’ icon in manual control, enter the appropriate values then ‘Start’ the device.
- After completion of dosing close the manual control.
- Performing a titration with existing method:Click ‘load method’/‘Internal memory’/‘Show files’.
- Select required method and load the method by pressing ‘Load’.
- Enter the ‘Username’. Enter the sample information, sample size in respective columns.
- A transfer accurately specified quantity of the sample into the titration vessel and dissolves the sample completely in the specified solvent and immerse the Electrode and burette tip in the titration vessel.
- Click on ‘Start’ button in the window to start the titration.
- Titration curve is shown during the titration in the window.
- After completion of the titration, titration will stop at the specified volume mentioned as in the method. (If you want to stop titration before reaching the stop condition, click on ‘Skip command’, the report will automatically print out as per method.
- Printing the report: Click ‘Print’ in the main window and select the ‘Report seq. as def. in method’.
- Creating a new method:
- Click on ‘Load method’ ‘New method’, select required Metrohm method templates and click the ‘Load template’.
- Click on ‘Edit parameters’, the Parameters/Sequence window appears, which contains’ Titration mode’, calculation and ‘Report’.
- Select titration mode, then click on ‘Edit command’ and enter or select the required parameter in each column.
- After entering all the parameters, choose the command ‘Back’.
- Select ‘Calculation’, then click on ‘Edit command’/ ‘New; select required. Metrohm method templates and click on ‘Empty result’.
- Click on formula column, enter the formula as per method by selecting Appropriate variable in the window, then click ‘OK’.
- EPX * CVY * Factor / C00
- EPX = End point and X = 1, 2, 3…
- CVY = Common variables and Y = 01, 02, 03…
- C00= Sample size
- The strength of the solution is selected from common variables which were previously entered, which is designated as CVY.
- The sample size is entered at the time of determination.Click on ‘OK’ to save the formula.
- Enter the ‘Result name’, ‘Decimal places’, ‘Result unit’ as per the method in the respective column.
- Double click on ‘Back’ to come back to ‘Parameters/Sequence’ menu window.
- Select ‘Report’ then ‘Edit command’ insert the required results parameter by Clicking ‘Insert’ and select the required parameter and click on ‘Select’.
- Repeat the process for consequent addition of parameter.
- Click on ‘Back’ to come back to ‘Parameters/Sequence’ window.
- Saving the results:
- Click ‘Method options’/’Save automat’.
- Click on ‘Save determination automatically’ Select the file name in the ‘File name’ column choose the required sub folder in the ‘Group’ column. (The file name will be automatically stored as your identification name.)Double click on ‘Back’ icon.
- saving the method:Select ‘Save method’ in the Parameters/Sequence.
- Enter the file name in the ‘File name’ column and select internal memory in the ‘Memory’ column and enter the appropriate sub folder in the ‘Group’ column.
- Click on ‘Save’.
- Handling of KF reagent:
- Do not place the electrode directly in to the KF cell because excessive moisture will be introduced along with the electrode rinsing with the solvent to be used.
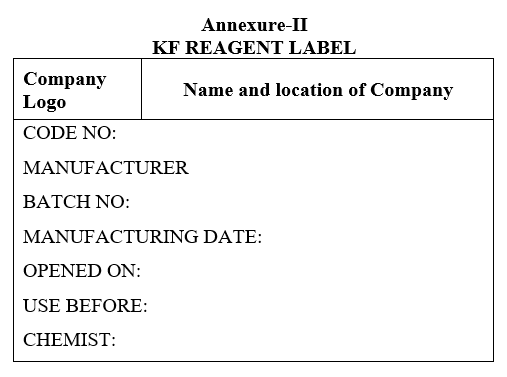
- The KF reagent which do not have the expiry date details as indicated beloUnopened KF reagent bottles shall be assigned 2 years shelf life from the date of Manufacturing as per format-II.
- Opened KF reagent bottles shall be assigned 6 months from the date of open as per format-II but shall not exceed the expiry period of the manufacturer.
- It is recommended to always leave the cell on standby i.e. the titrator measures the effect of ambient humidity during conditioning so that the KF cell is ready for use.
- Always enter the KF titter expiry date during the programming of KF reagent library so that the operator will then be prompted when it is time to replace the KF reagent.
Note: Electrodes should be selected based on the numbers mentioned in respective Standard Test Procedure. If electrodes of same number are not available use the equivalent electrode.
Click the link to download word file copy of this document:
https://pharmaguidehub.com/product/operation-of-auto-titrator/
- REFERENCES:
Not Applicable
- ANNEXURES:
| ANNEXURE NO. | TITLE OF ANNEXURE |
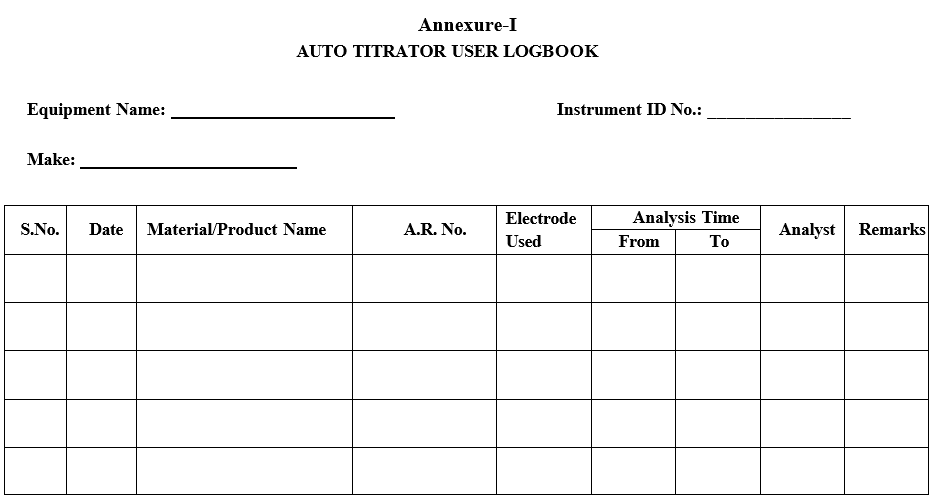
| Annexure-I | Auto titrator user logbook |
| Annexure-II | KF Reagent label |
ENCLOSURES: SOP Training Record.
- DISTRIBUTION:
- Controlled Copy No. 01 : Head Quality Assurance
- Controlled Copy No. 02 : Head Quality Control
- Master Copy : Quality Assurance Department
- ABBREVIATIONS:
| No. | : | Number |
| SOP | : | Standard Operating Procedure |
| QC | : | Quality Control |
- REVISION HISTORY:
CHANGE HISTORY LOG
| Revision No. | Details of Changes | Reason for Change | Effective Date |
| 00 | New SOP | Not Applicable | To Be Record Manual |
Annexure-I
AUTO TITRATOR USER LOGBOOK
Annexure-II
KF REAGENT LABEL
Click the link to download word file copy of this document:
https://pharmaguidehub.com/product/operation-of-auto-titrator/