
- PROCEDURE:
- Preparation of the instrument for testing:
- Daily exterior body of the Milli flex plus pump shall be wiped with sterile lint free cloth, moistened with 70% IPA/ Sterillium.
- Connect the power cord, RS -232 outlets and Drain tubing to the Milli flex plus pump as per diagram 1.
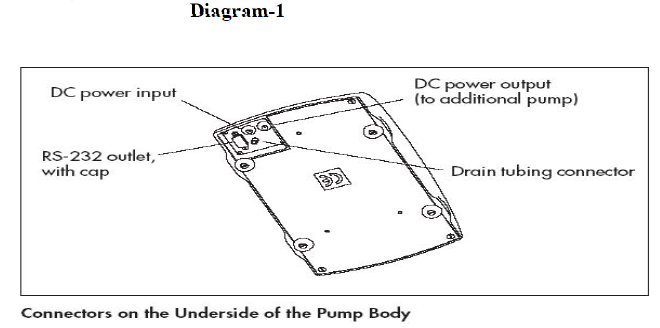
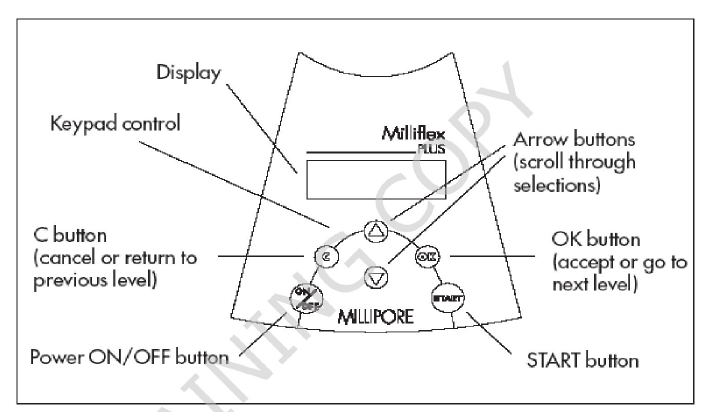
diagram-2
- Connect the instrument to the Main Power supply.
- To prepare for testing, switch on the pump by pressing the “ON/OFF” button on the keypad.
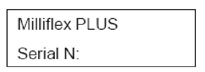
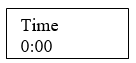
- The display will show the following for a few seconds.
The main program screen will display the following
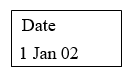
- Enter the current Date, Month & Year and Press OK.
- The display will show as follows:
- Enter the current Time and Press OK.
- Then the display will show as follows:
Press OK.
The main program screen for the previously selected program is displayed.
- Processing of samples shall begin immediately from the main menu display screen, using selected modes as follows :
- Tare
- Sampling
- Sanitizing
- Configuration
- Export data
- To reach the main menu from any program screen, press “OK”.
- Then the display shows the “TARE”. This is the entry point to the main menu.
- TARE:
- The tare procedure shall be performed whenever the pump head is changed, and whenever the display does not show “0”, with an empty funnel on the head.
- When the display shows “TARE” press “OK”. The display shows as follows:
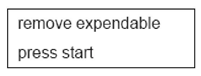
Remove anything on the pump head (Eg., Cover or Disposable ) and press “START”. The display shows:

- After few seconds, the display returns to the Main program screen for the previously- selected program.
- SAMPLING:
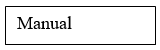
- MANUAL SAMPLING:
- The sampling menu Provides access to Auto sampling, Dilution and manual modes of operation. If required customized sampling program can be added or deleted.
- Whenever the Manual sampling mode is selected in the main menu, use the “UP” and “DOWN” arrows to select “SAMPLING” and press “OK”. The display shows.
Press “OK”. The display shows
To turn “ON” the volume measurement presses the down arrow. The display shows
Press “OK” the display shows
Again Press “OK” the display shows

Use “UP” and “DOWN” arrows to select the density of the liquid to be tested. and press “OK”. The display shows
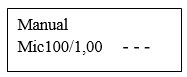
- This is the manual testing screen (When Volume ON is selected). Now testing can start in Manual Sampling Mode.
- After the completion of testing, go to enabling export data and take the print out.
- AUTO SAMPLING
- Whenever the Auto Sampling mode is selected in the main menu use “UP” and “DOWN” arrows to select “SAMPLING” and press “OK”. The display shows,
Press the down arrow once. The display shows
- Press “OK”. The display shows the name of the last Auto Sampling Program selected.
- The Factory-installed programs ( In-Built) are the following :
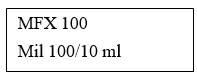
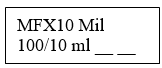
- MFX 10: 10 ml of water, with Milli flex 100 disposables
- MFX100: 100 ml of water, with Milli flex 100 disposable
- MFX2x100: 2 x 100 ml of water, with Milli flex 100 disposable
- RINSE3x100*: 3×100 ml of liquid( for rinsing), with Milli flex 100 disposable.
- MFX200: 200 ml of water, with Milli flex 250 disposable.
NOTE: * The rinsing program RINSE 3×100 is reported during Data Export, but is not Assigned in the list of samples filtered
- Use “UP and “DOWN” Arrows to move through the list of programs to the required program. Press “ OK” the display shows
To proceed to the selected program, press “ OK”. The display shows the main Program Screen for the selected program. For Example
- Testing can begin now in Auto Sampling mode.
NOTE: Custom programs can be added by the user to meet particular requirements.
- After the completion of testing, go to enabling export data and take the print out.
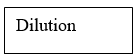
- DILUTION SAMPLING:
- The required volume and density of both the sample and diluting liquid are to be entered, for automatic testing of diluted sample.
- In the Main Menu, use the “UP” or “DOWN” arrows to select “SAMPLING”, press “OK” the display shows
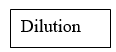
Press the “DOWN” Arrow Twice. The Display shows:
Press “ OK’ the display shows :
Use “UP” or “DOWN” arrow to select the Milliflex 100 funnel, press “OK”. The display shows:
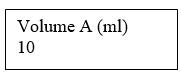
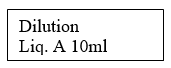
Use “UP” or “DOWN” arrows to select Volume A (which must be at least 10ml). Press “ OK”, the display shows:
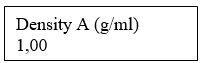
Use “UP’ or “DOWN” to select Density A. Press “OK”, display shows :
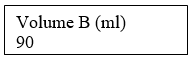
Use “UP” or “DOWN” arrows to select Volume B. Press “OK” , display Shows

Use “UP” or “DOWN” arrows to select Volume B. Press “OK” , display Shows
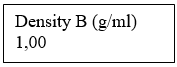
Use “UP or “ DOWN’ arrows to select Density B. Press “OK”, display Shows:
- Press “ C” to cancel the previous entries, return to “Dilution” sampling mode.
- Press “ OK” to Continue, the display shows the dilution testing main screen:
- Now start the Testing in Dilution Mode.
- Adding an Auto Sampling Program:
In the Main Menu, use the “UP” or “DOWN” arrows to select “Sampling” and Press OK. The display shows
Press the “ DOWN” arrow once. The display shows:
- Press “ OK”. The display shows the last Auto Sampling Program Selected.
Use the “DOWN” arrow to move through the list of program to the required program until the display shows:
Press “OK”. A Solid Square Appears. Press the “ DOWN” Arrow, the display shows:
- This character selection screen is used to specify the name of the program.
- Press “UP” or “DOWN” arrow to highlight a character and then press “OK” to select it. The selected character is displayed.
- Press the “UP” or “DOWN” arrow to display the character selection screen again.
- Repeat this process for each character. The characters selected so far are displayed when “OK” is pressed.
- To delete the Last character entered, press C.
- When complete name has been selected, press “OK” to confirm it. The display shows:
Press “OK”, display shows the volume of the selected funnel, plus 10%.
- Press the “UP or “DOWN” arrow to select the density of the liquid to be filtered and Press “OK”. The display shows the Main Program Screen for the added program.
- Editing an Auto Sampling Program:
- In the Auto Sampling menu, use the “UP” and “ DOWN” arrows to move through the list of programs to the required program.
- Press “ OK”, the display shows:
Press the “ DOWN” arrow, the display shows
- Press “OK”. The display shows the name of the selected Program.
- After selecting the density of the liquid, press “ OK” to confirm the new program.
- Deleting an Auto Sampling Program:
- In the Auto Sampling Program Menu, use the “UP” and “DOWN” arrows to move through the list of programs to the required program.
- Press “ OK”, the display shows:

Press the “UP’ arrow, the display shows:
Press “OK” to delete the program (press “ C” to cancel). The display shows:
- Press “C” to return to Auto Sampling Menu.
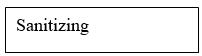
- Sanitizing:
- At the Main Program Screen, press “OK”, to enter the main menu. The display shows:
Press the down arrow until the display shows:
Press “OK” , the display shows:
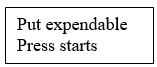
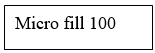
Place a fritz which is a membrane support and Microfil 100 funnel on the pump head and press “START”. The display shows:

- Fill the funnel with 100 ml of any of the following sanitizing agent
- 70 % IPA or Sterillium.
- Peracetic acid 0.125% , Sodium Hypo chlorite solution or any other suitable agent.
NOTE: Use Mixed cellulose esters membrane for any recommended sanitizing agents, except solutions containing alcohols.
- Press “START” , If the pump detects too little agent , the display will show :
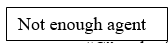
- If this display is shown, press “C” and refill the funnel.
NOTE : Use PVDF membrane for alcohol based sanitizing agents.
- If enough agent is detected, pump starts and display shows:
- The Pump automatically circulates a measured quantity of sanitizing agent through the interior of the fluid.
- Initially the pump pulls through 50 ml of agent, pauses for ten minutes, and then pulls through the remaining 50 ml.
- A bar graph at the bottom of the display shows the progress of this operation.
- After the pump has emptied the funnel, it runs a drying cycle and then the display shows:

Fill the funnel with sterile water and press “ START”, the display shows:
The pump empties the funnel and runs a drying cycle. Then the display shows:
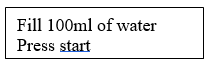
- Fill the funnel with 100 ml of sterile water and press “ START”. Then rinsing cycle is performed.
- Again the Display prompts for funnel to be filled with sterile water, for each Rinse, for a total of four rinses.
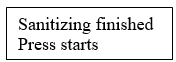
Press, “START”, remove the funnel and discard it. The display shows:
- Press “C” to go back to the Main program Screen.
- Remove the head and sanitize with 70 % IPA or Alternatively Autoclave the Head as and when required.
- NOTE: At the end of each working day sanitize the pump interior with appropriate sanitizing agent. Every week Autoclave the pump head at 121°C for 45 mins.
- Enabling or disabling data export:
- Be connected to a dedicated printer.
- Data export shall be enabled, before testing begins.
- The date and Function will be maintained as long as the pump is plugged.
- Data export is available in all modes i.e., Auto Sampling mode, Manual Mode (When Volume “ON”) and Dilution mode.
- Before enabling data export, ensure that there is enough paper on the roll.
- In the Main Menu use the “DOWN” arrow to scroll down to “Export Data”. Press “OK”.
To enable data export, press OK. The Display shows the word “OPERATOR” and Black Square. Press the down arrow, the display shows:
- This character selection screen is used to specify the name of the operator.
- When the complete operator name has been selected, press “ OK” to confirm it.
- The display shows Milliflex Disposable lot No , Press “OK”
- The Display shows Cassette Lot number / Media lot Number No, Press “OK” to confirm it.
- Then Display Shows
- This provides an opportunity to print sample serial numbers starting at any chosen value.
- Use “UP” and “DOWN” arrows to set the starting value for sample serial numbers. Press “OK”.
- Then confirm the date and time using the “UP” and “DOWN” arrows. Press “OK” to confirm the competed entry, in each case. The display Shows :
- Press “START” for printing. Auto Sampling data will be printed.
- To disable the data export, scroll down to “EXPORT DATA” . Press “OK”.

To disable data export, press the “DOWN” arrow. The display shows:
Press “OK” . the display shows:
- Now the Data Export disabled.
- Sample Processing:
- Select appropriate method for the sample processing as mentioned in the Preparation of Instrument.
- Testing shall be done in Laminar air flow cabinet/ bench.
- Place the fritz on the pump head with sterile forceps.
- Place the pre-sterilized membrane onto the filter support (fritz).
- Aseptically remove a sterile funnel from its packaging cover.
- Firmly press the funnel onto the pump head. Perform ‘TARE’ procedure.
- Pour the appropriate volume of sample into the funnel.
- In ‘MANUAL MODE’, if Volume “ON” has been selected, the display will show the volume filled.
- After reaching the required volume, stop pouring. In manual Mode, press “START” to start the pump.
- Operate the pump until the sample has been filtered, then press “START” to dry out the pump head.
- Wait for the pump to ‘STOP’.
- In Auto Sampling Mode, the buzzer will sound when the required volume has been reached.
- In Auto Sampling Mode the filtration starts automatically.
- Immediately the pump switches automatically to drying.
- Wait for the Pump to ‘STOP’.
- Remove the funnel from the pump head.
- Remove the membrane with sterile forceps and place the membrane on the pre-sterilized and pre-incubated media.
- Spray the 70% IPA on the Fritz and allow it to dry.
- Carry out the filtration for the next sample.
- NOTE: After each filtration spray the 70 % IPA on the fritz. and allow to dry it.
- Sample Processing:
Disposal of funnels: Decontaminate the used funnels as per SOP at 121°C for 30 minutes before disposal.