- PROCEDURE FOR THE INTEGRITY CHECK FOR SIEVE AND MESHES:
- Integrity check for sieve meshes equal or below # 30.
- Check the cleanliness of mesh before start the calibration.
- Affix “UNDER CALIBRATION” label.Keep the marked paper below the mesh and count the apertures with the help of magnifying glass count the number of holes in linear inch in both direction (Horizontal and Vertical direction).
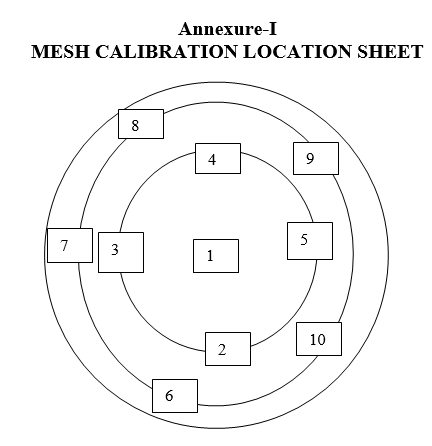
- Take minimum ten location counts in each mesh.
- Calibrate the mesh sizes 30 # and below as per above procedure.
- Calibrate the mesh sizes above 30 # using Densimeter as mentioned below.
- CALIBRATION OF MESHES BY USING DENSIMETRE:
- Keep density meter on the sieve in such way letters are facing us and other side is touching the sieve.
- Move the density meter so that any one vertical line of densimeter is matching with the vertical line of the mesh Grids will start forming on the densimeter.
- Peak of grid form like the peak of the mountain.
- The line of this peak where it matches the mesh number mentioned on the densimeter is the actual mesh number of the sieve.
- All the meshes calibrate once in a year.
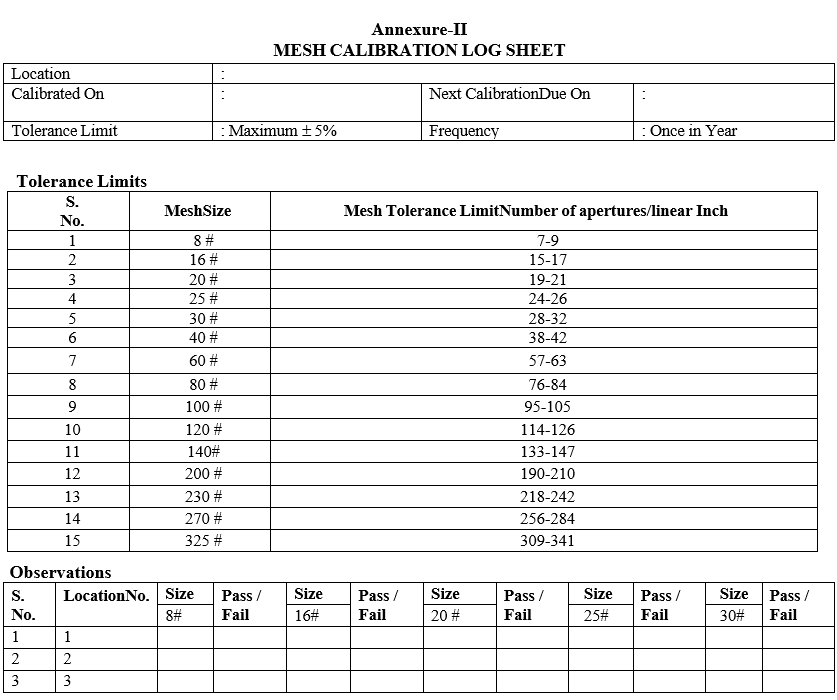
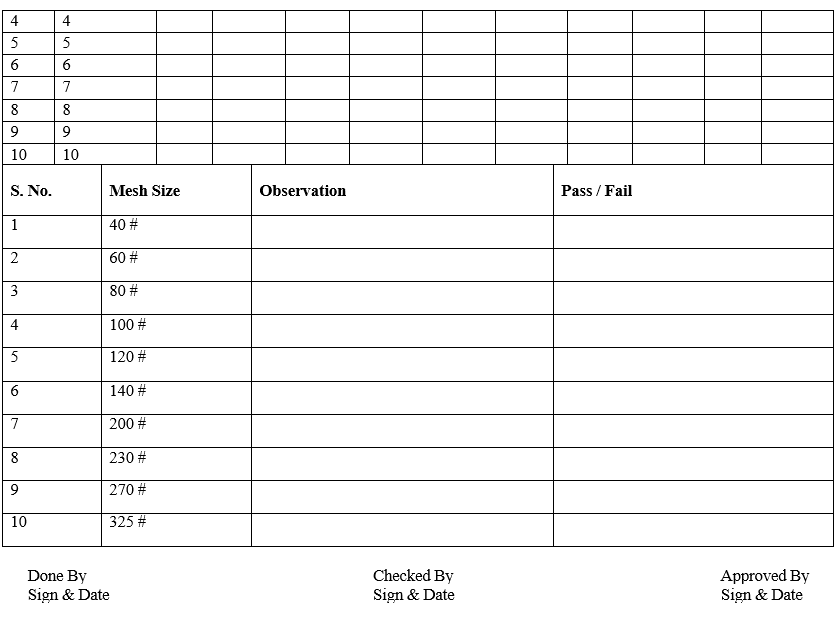
- If any discrepancy observed immediately inform to the department head for the necessary action.All Results of meshes shall be recorded in the Annexure-II.
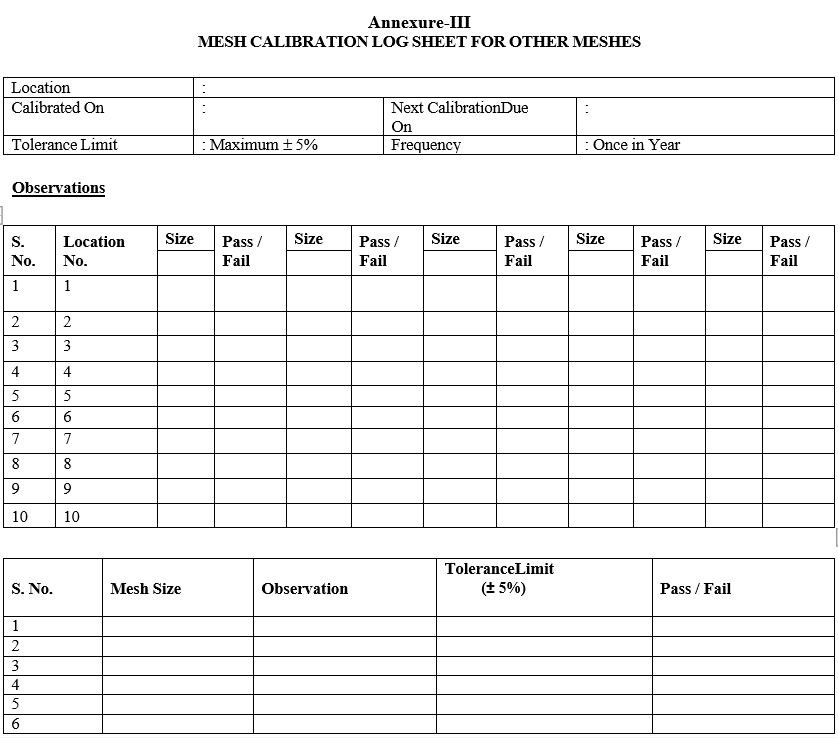
- If any other meshes are received shall be calibrated as per the respective procedure and enter the results in Annexures-III.
- Note:
- New meshes received shall be calibrated as per the respective procedure.
- Damaged sieve should be destroyed and replaced with new.
- ANNEXURES:
| ANNEXURE NO. | TITLE OF ANNEXURE |
| Annexure-I | Mesh calibration location sheet |
| Annexure-II | Mesh calibration log sheet |
| Annexure-III | Mesh Calibration Record for other Meshes |
Annexure-I
MESH CALIBRATION LOCATION SHEET

Annexure-II
MESH CALIBRATION LOG SHEET


Annexure-III
MESH CALIBRATION LOG SHEET FOR OTHER MESHES


