
- PROCEDURE FOR THE CANTILEVER OCTAGONAL BLENDER:
- MAKE: TAPASYA
- A cantilever octagonal blender is a type of industrial blender that uses an octagonal-shaped mixing vessel mounted on a cantilever arm. The cantilever arm allows the vessel to tilt and rotate, which creates a tumbling motion that efficiently blends dry ingredients together.
- Check for the cleanliness of the area and Equipment. Check that the required size of blender shell is in cleaned condition.
- Remove the “CLEANED” label and paste it into the BMR and affix “UNDER PROCESS” label.
- Transfer all the materials to be lubricated as per the BMR to the blending area.
- Set Up:
- Switch ON the power supply to the equipment by turn the control key to ON position and release the emergency button.
- Open safety railing of the blender. Bring the required size blender shell nearer to the blender along with trolley.
- Turn the remote key of Blender to ON position. The remote key light will indicates the status.
- Press ‘Blender UP’ button of blender to move the blender to upward position, press ‘Blender down’ button to move the blender to down word position.
- Press and hold the ‘blender down’ button till the blender reaches to down position.Now clamp the blender shell to the blender frame and lock the frame with help of 2 hand wheels provided.
- Tightly lock the blender shell to the blender frame with hand wheels.
- Ensure that the blender shell is properly secured in the blender frame.
- Now press and hold the ‘Blender up’ button to move the blender shell to top most position, ensure that the ‘up proximity’ should be in green position in the interlock screen.
- Open the safety railing; remove the blender trolley from the blending area.Turn the remote key to OFF position.
- Ensure that the pneumatic butterfly valve is in closed condition.
- NOTE:
- The machine will not operate without safety guards railing in position.
- For smaller and finer movements use inching button in the HMI for rotation.
- LOADING OF THE MATERIAL:
- Close the safety railing of the blender, Turn the remote key to ON position.
- Bring down the blender shell to bottom position by pressing the blender down button.
- Open the rectangular top lid of the blender shell and close the pneumatic butter fly valve.
- Manually load the materials in to the blender shell with of cleaned SS scoops.
- After loading of all materials into the blender shell close the rectangular lid and lock with bolts.
- Press and hold the ‘blender up’ button until the blender shell reaches the top most position.
- Turn the remote key to off position.
- OPERATION:
- After turn on power supply the following screen will be displayed in the HMI

Touch ‘LOGIN’ icon in the above screen then the following window will pop up.
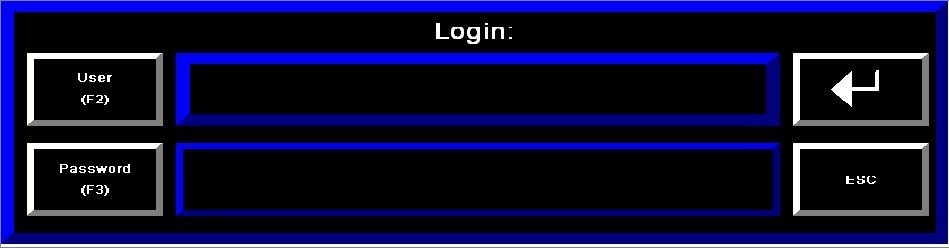
- Press User button to enter username & press Password button to enter its password.
- Following keypad will popup to enter alphanumeric entry.
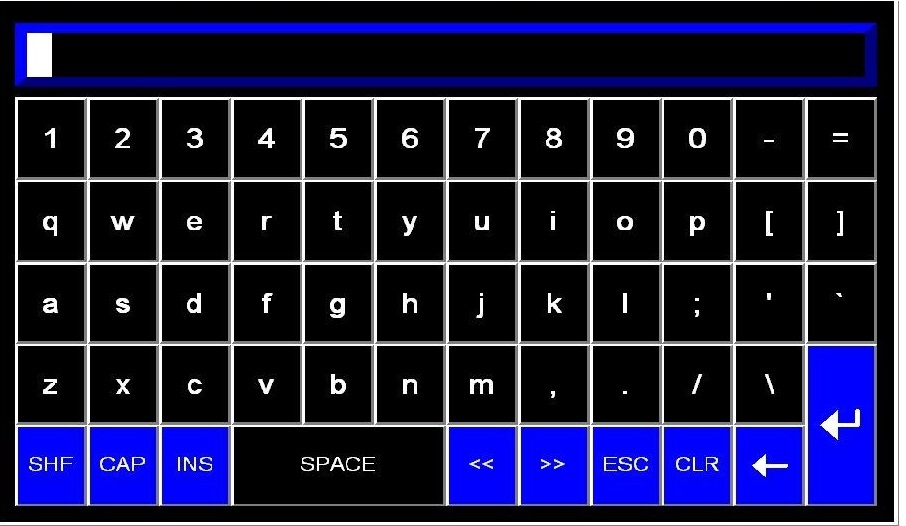
- After required entry, press Enter key. You will get successful login message in diagnostic bar.
- Now touch ‘Welcome’ icon in the main screen then the following screen will be displayed in the HMI.
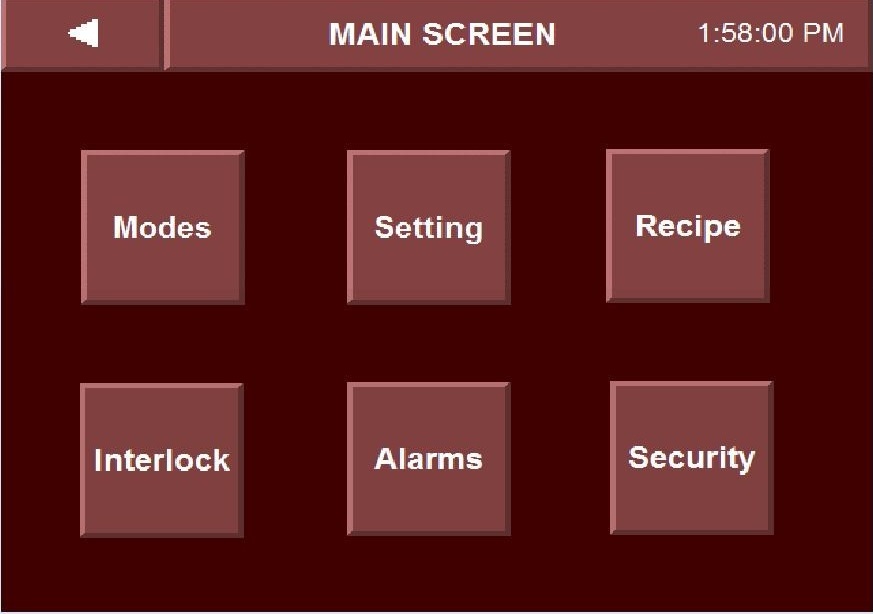
- Touch ‘modes’ icon in the above screen then the following screen will be displayed.
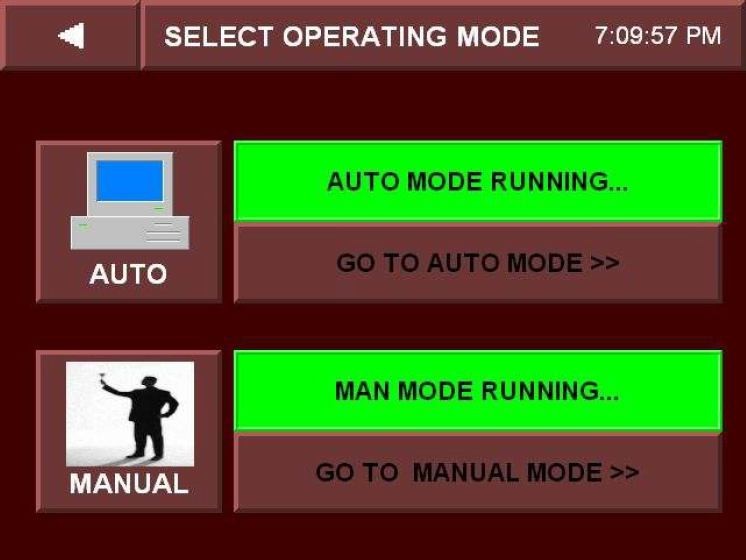
- Touch ‘MANUAL’ icon in the above screen then “Man Mode Running’ will be indicated with green indication, now touch Go To Manual Mode’ icon in the above screen then the following screen will be displayed.
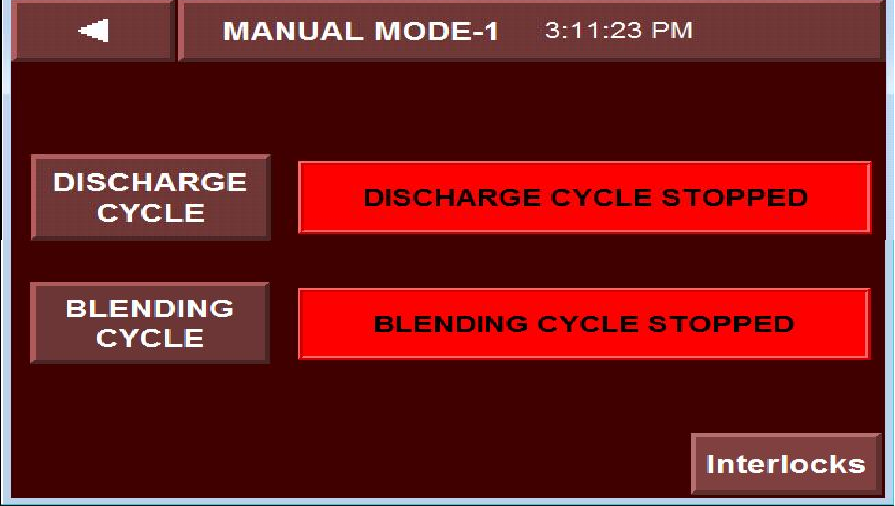
- Touch ‘Blending cycle’ icon and the press right arrow button the following screen will be displayed.
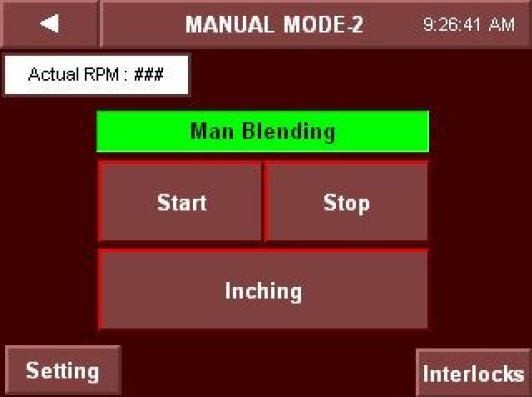
- For inching of blender touch inching icon in manual mode and check for proper rotation of blender.
- Touch ‘Setting’ icon in the above screen the following screen will be displayed.
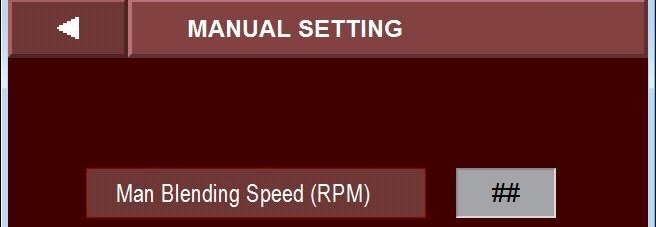

- Set the manual Blender speed, inching speed in manual mode.
- Touch ‘interlock’ icon in the above screen then the following screen will be displayed.
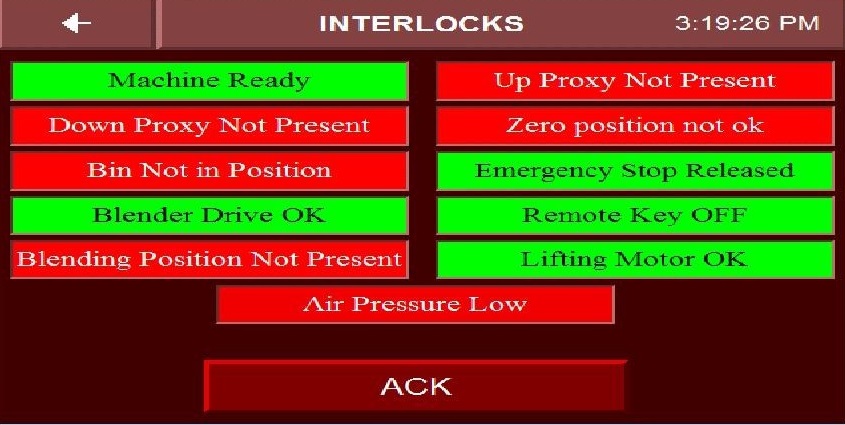
- Check for interlocks in red indication and acknowledge alarm & silence the hooter by pressing ‘ACK’ button.
- During Blender operation if you face any interlock then following alarm banner will be pop-up

- Touch close alarm banner to close the alarm banner.
- Touch left arrow key in the interlock screen and go to blender mode screen.
- OPERATION -BLENDING:
- Touch setting icon in the Main screen then the following screen will be displayed.
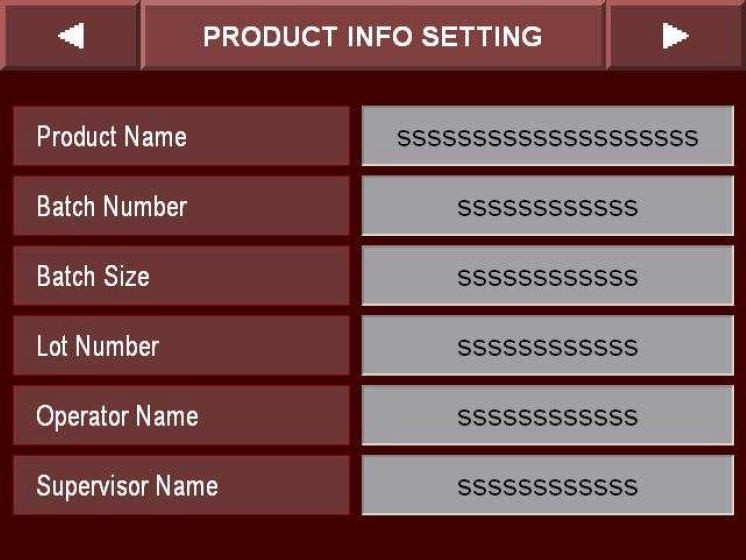
- The following parameters can be entered in this screen.
1) Product Name : Enter the product name in this column.
2) Batch No : Enter the batch number in this column.
3) Batch Size : Enter batch size in Kgs in this column.
4) Operator Name : operator name to be entered in this column.
5) Supervisor Name: Name of the supervisor to be entered in this column.
- Touch right arrow icon in the above screen then the following screen will be displayed.

- The following parameters can be entered in this screen.
1) Preblending Time (Min): Enter the pre blending time in this column.
2) Post blending time (Min): Enter the post blending time in this column.
3) Preblending speed (RPM): Enter the blender speed during pre blending.
4) Post blending speed (RPM): Enter the blender speed during post blend cycle.
5) Print Interval: Set the print interval in sec in this column.
- After entering all above parameters, press ‘Save Recipe’ Icon to save the recipe.
- The following screen will be displayed for recipe save.
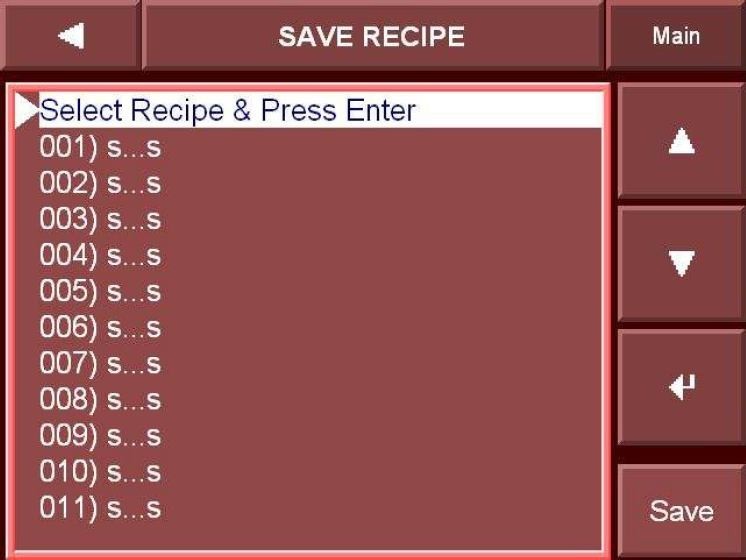
- Save the recipe by touching up/down arrow keys and followed by pressing enter key. The message “Recipe Saved Successfully” will be displayed.
- To go back to main screen touch left arrow key.
- Touch ‘RECIPE’ icon in the main screen then the following screen will be displayed.
- Load the required recipe for blending operation by using up/down arrow and then press Load icon. A message ‘Recipe successfully loaded’ icon will be pop

- Touch MODES icon in the main screen then the following screen will be displayed.

- Touch ‘AUTO’ Mode icon then ‘Auto Mode Running’ icon shall indicate with green color.
- Now touch ‘Go To Auto mode’ icon in the above screen the following screen shall be displayed.
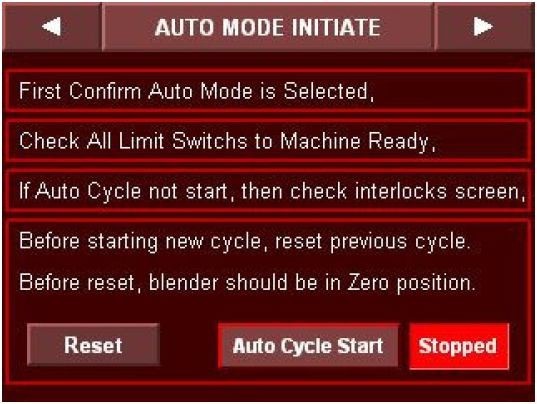
- Check all precautions mentioned in the above screen and then reset the previous cycle by pressing Reset Icon.
- Then the following screen will be displayed, press Yes icon then previous cycle will reset and Cycle reset successfully icon shall glows.
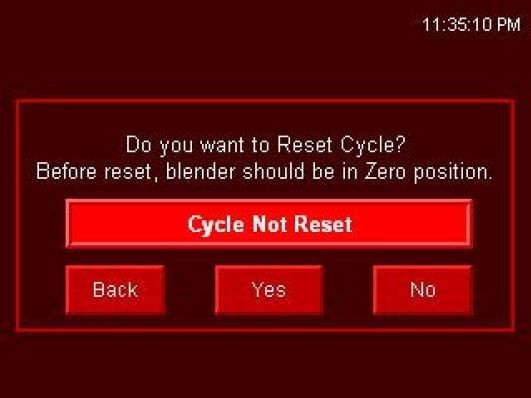
- Note: Before start Auto cycle user must have to reset the Auto cycle.
- After resetted the Auto cycle press Auto Cycle Start button, then the following screen will be displayed.
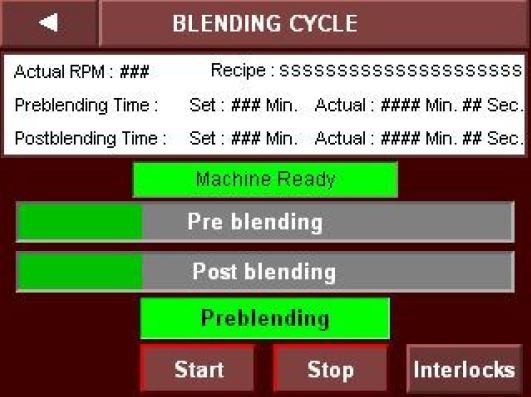
- Check the blending time and RPM in the above screen before starting the blending cycle.
- Now press Start button then pre blending cycle will start and will run as per the set parameters.
- Pre blending & Post blending set time and actual time is shown on this screen

- When Prelanding Cycle completed above screen will be automatically popup.
- Press OK button then blending cycle screen will be displayed, now touch Start icon then post blending cycle will be started with status bar.
- After completion of Post Blending cycle below screen will be automatically popup.
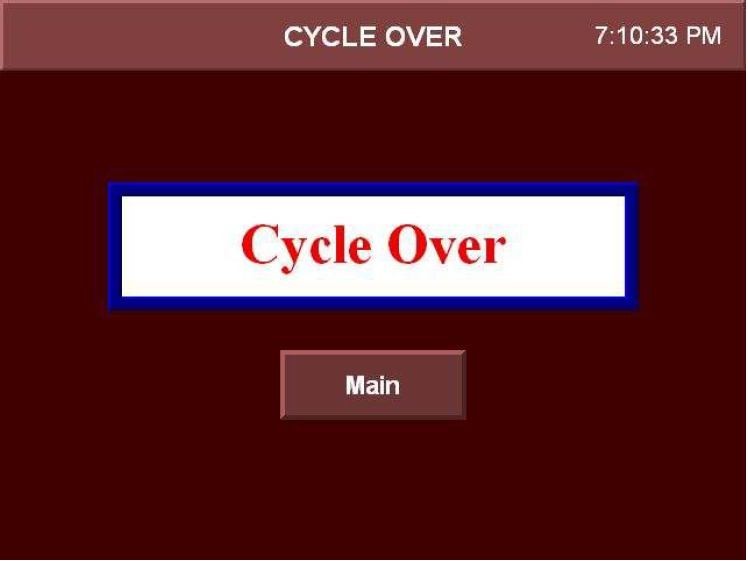
- To go to the Main menu press Main button.
- Touch ‘ALARM’ icon in the main screen then the following screen will be displayed.
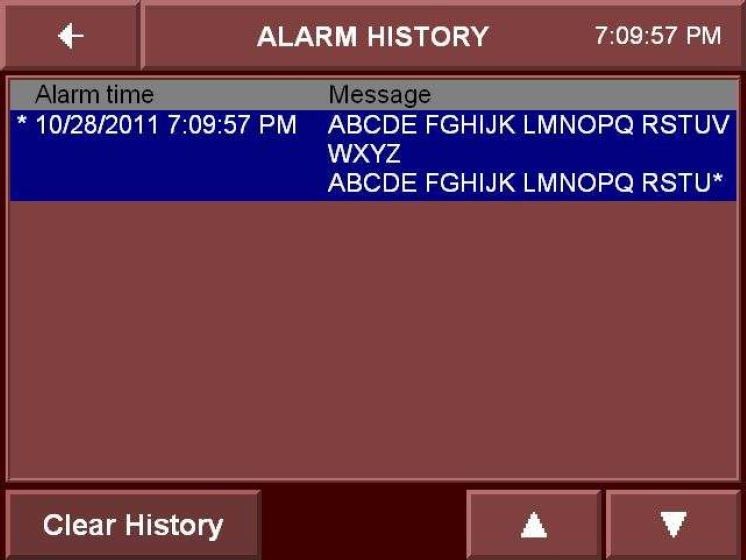
- Touch Clear History Icon to clear the alarm history.
- UNLOADING OF THE BLEND:
- Put the remote selector switch to ON position.
- Press and hold the ‘blender down’ button until the blender shell reaches to bottom position.
- Open the safety railing of the machine.
- Place pre labelled IPC container below the discharge butterfly valve.
- Close the safety railing of the machine.
- Slowly open the butterfly valve, by pressing Discharge open push button on panel frame, close the butterfly valve by pressing discharge close button.
- Empty the contents of the blender into the IPC, weigh the IPC and record the weighing details in the Product label and in BMR.
- Repeat the above process until all the materials are unloaded in to the IPC bin.
- Open the safety railing of the machine and remove the IPC from the blender.
- Transfer the IPC in to the blend hold area for processing to further step.
- Record the operation details s in the equipment logbook.
NOTE: Check that the mains are switched off after complete operation of the blender.
- Remove the “UNDER PROCESS” label and affix the “TO BE CLEANED” label to the machine.
- PRECAUTION:
- Check that no person is inside the safety railing and that there is no obstruction to the rotating blender.
- Check that all the materials to be mixed are loaded in the blender as per BMR before starting the operation.
- Ensure that the total content of blender is unloaded in to the IPC after blending.
- ABBREVIATIONS:
| No. | : | Number |
| SS | : | Stainless steel |
| BMR | : | Batch manufacturing record |
| BPR | : | Batch packing record |
| SOP | : | Standard Operating Procedure |