OBJECTIVE:
To lay down the procedure for Operation of Rotary labeler and booklet outserter.
SCOPE:
This SOP is applicable for the procedure for Operation of Rotary labeller and booklet outserter at {Company Name} {Location}.
RESPONSIBILITY:
Officer/Executive/Designee: Shallbe responsible to follow the procedure as per SOP.
Head/Designee Production: Shall be responsible to ensure the compliance as per the SOP.
ACCOUNTABILITY:
QA Head shall be Accountable for implementation of SOP.
About Equipment:
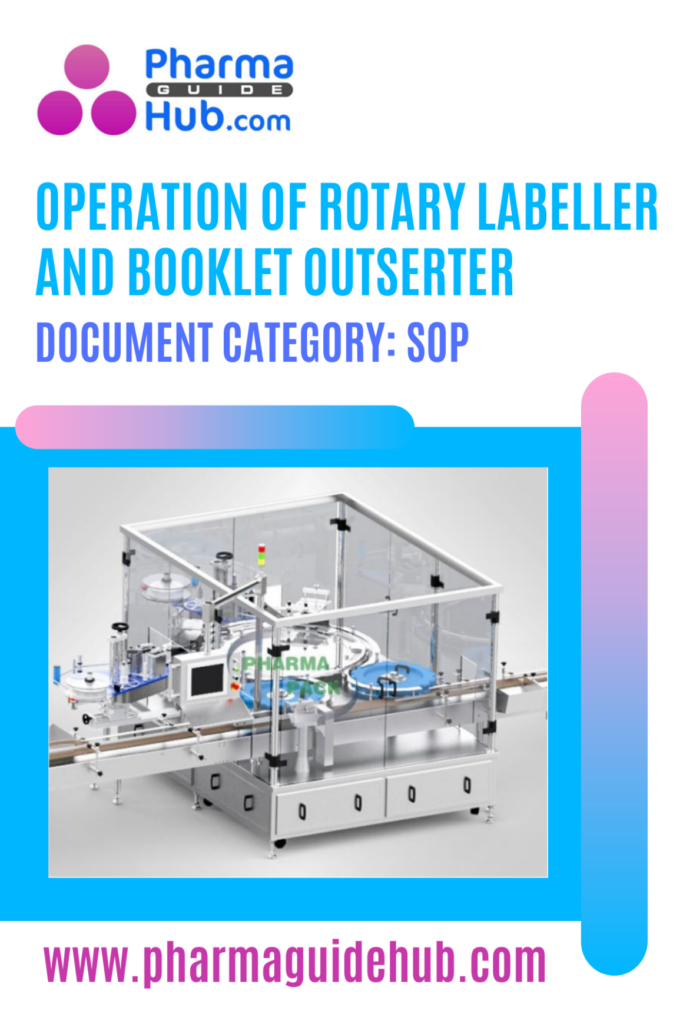
Rotary Labeller and Booklet Outserter are two essential machines used in the pharmaceutical packaging industry, particularly for packaging products like tablets, capsules, and vials. These machines are typically manufactured by companies like Pharmapack Technologies Corporation.
Rotary Labeller:
Function: Applies labels to various shapes and sizes of containers, including round bottles, vials, and ampoules.
Process:
Labeling Accuracy: The machine ensures precise label placement and alignment.
Label Feeding: Labels are fed from a roll and accurately positioned by the machine.
Label Application: The label is applied to the container as it rotates on a conveyor belt.
Booklet Outserter:
Glue Application: Glue is applied to secure the booklet in place.
Function: Inserts leaflets or booklets into the packaging of pharmaceutical products.
Process:
Booklet Feeding: Booklets are fed into the machine and positioned for insertion.
Booklet Insertion: The machine accurately inserts the booklet into the packaging, often onto the cap of a bottle or vial.
OPERATING PROCEDURE:
Pre-start up:
Check and ensure that the machine is free from previous batch/product traces.
Check and ensure the equipment is cleaned and affixed with “CLEANED” status label.
Line clearance shall be taken from IPQA executive, before starting the operation.
Remove the “CLEANED” status label and affix “UNDER PROCESS” status label on the equipment.
Check and ensure the temperature and relative humidity of the room are within the limits.
Start up:
Open the compressed air valve and maintain air pressure at 4-6 kg/cm2
Switch “ON’ the main power supply.
Turn the power key on control panel to “ON’ position.
Switch “ON’ the conveyor.
Set up of labelling unit:
Load the label role on the label role disc.
Guide label to go through transition roller-1, transition roller-2, label damp press board, label sensor, transition roller.
Then pull out the clamp of label body paper, encircle label around axis of body paper withdrawing.
Then insert clamp of label body paper to press the label body paper.
Finally, clockwise rotate the axis of body paper withdrawing and also make body paper encircles for 2-3 circles.
Align the labelling unit according to the height of container.Label press board must be pressed on the label.
When label encircles the main axis, pull up the handle and make press roller and main roller separate from each other.
After finish encircling the label, tighten the press handle.
Make sure that there is no label present before the label sensor on the label roll.
Printing unit set up:
Remove the printer head from printer.
Take the metal stereos from packing Supervisor/In charge and arrange them on the printer head as per details in the BPR.
Replace the printer head.
Check the condition of hot stamping foil.
Adjust the printing unit as per the space provided for coding details on label.
Usage of MMI screen:
Connect power supply by turning the key in ON position, The screen will appear as Screen-1, Then touch the center of the screen at “(1)” then Next screen will appear as Screen-2.

Input the password (1) then press OK (2) as shown in screen-2 and then Main Operation Interface (Screen-3) will appear.

From this Main Operation Interface one can START (3)/STOP (4/5) the machine, view the current running speed (10),to view the current loaded recipe (2), to run the conveyor in jog mode (6), check the alarm status by selecting ALARM (7), can go to the PARAMETER (8), to check the functions manually (9), Touch the Operation icon (1) to view the Operation interface from any screen as shown in the screen-3.
The next Screen will appear as Screen-4.

Touch on the PARAMETER (8) icon as shown in the screen 3.
In the next screen it will ask for the password. Enter the correct password (1) and then press OK (2) as shown in screen 4.

Now touch on the running parameter (1) as shown in the screen 5. The next screen will appear as screen-6


Label delay out: Put the label delay out timing (1) as per the observation (Screen-6).
Pre length: Put the pre length value (2) as per the requirement (Screen-6).
Label V1: Put the label V1 value (3) as per the requirement (Screen-6).
Second stage shift spot: Put the value (4) as per the requirement (Screen-6)
Label V2: Put the label V2 value (5) as per the requirement (Screen-6).
Camera detection station: Put the camera detection count (6) for the rejection as per the observation (Screen-6)
Touch on the down arrow key (7) to go to the next page of the parameter setting (Screen-6). The next screen will appear as screen-7.

Spindle-V: Put the spindle moving speed (1) as per the requirement (Screen-7).
Conveyor-V: Put the conveyor speed (2) as per the observation (Screen-7).
Print Time : increase or decrease the print time (3) as per the observation of print quality (Screen-7)
Bottle jam delay : Put the bottle jam delay as per the requirement (Screen-7)
Rejection delay time: Put the rejection delay time for proper rejection of rejected bottles as per the observation (Screen-7).
Rejection action time: Put the rejection action time as per requirement (Screen-7).
Touch on the down arrow key (7) to go to the next page of the parameter setting (Screen-7). The next screen will appear as screen-8.

UV detection station: Put the UV detection count (1) for the rejection of without labeled bottles as per the requirement (Screen-8).
Barcode 1 detection station: Put the rejection count (2) for the rejection of barcode 1 detection station as per the count observation (Screen-8).
Barcode 1 detection angle: Put the angle value (3) for proper scanning of barcode as per the observation (Screen-8)
Barcode 2 detection station: Put the rejection count (4) for the rejection of barcode 2 detection station as per the observation (Screen-8).
Barcode 2 detection angle: Put the angle value (5) for proper scanning of barcode as per the observation (Screen-8)
Barcode 2 to bottle out feed station: Put the count (6) from barcode 2 to the bottle out feed station as per the observation (Screen-8).
Touch on the down arrow key (7) to go to the next page of the parameter setting (Screen-8). The next screen will appear as screen-9.

Booklet place angle Put the angle value (1) as per the observation for proper placing of booklet (Screen-9).
Booklet suck angle: Put the angle value (2) as per the observation for proper pick up of booklet (Screen-9).
Booklet suck station quantity: Put the value (3) as per the observation (Screen-9).
Glue dispensing angle: Put the angle value (4) of glue dispensing in proper required position as per the observation (Screen-9).
Glue dispensing action time: Put the glue dispensing action time (5) as per the requirement (Screen-9).
Glue dispensing station quantity: Put the value (6) as per the observation (Screen-9).
Touch on the down arrow key (7) to go to the next page of the parameter setting (Screen-9).
The next screen will appear as screen-10.

Buffer step Motor V: Put the value (1) as per the observation (Screen-10).
Buffer Wrap Motor V: Put the value (2) as per the observation (Screen-10).
Touch on the Parameter icon to go to the main page of parameter setting (Screen-10).
Product monitor intrface:
To save and Call the parameters and records of different product for easy operation next time touch on the PARAMETER icon in the main interface then touch on the PRODUCT icon.
The next screen will appear as screen-11.

In this menu it shows the index no. and the product name (1) as shown in the screen-11.
Up arrow (2) is used to view the last record as shown in the screen-11.
Down arrow (3) is used to view the next record as shown in the screen-11.
Touch on the Save icon (5) to upload to touch screen and to save in the current parameter as shown in the screen-11.
Touch on the Call icon (4) to download all the parameters in to the current record. The machine can use the current parameter as shown in screen-11.
After downloading the parameter touch on the APPLY icon (6) to use on the machine as shown in screen-11.
Label counting alarm interface:
Touch on the PARAMETER icon in the main interface then touch on the Label count.
The next screen will appear as screen-12.

In the current count (1) it shows the current dispensed count of labels as shown in screen-12.
Put the alarm icon (4) in ON condition as shown in screen-12.
Set the label quantity at which point the current count (1) and pre set alarm count (3) will match or current count is more, then the machine will stop with alarm.
During roll change clear the counts by touching the clear icon (5) and put the values as per the roll label quantity as shown in screen-12.
Put the surplus label quantity (2) as per the requirement as shown in screen-12.
System Parameter:
Touch on the PARAMETER icon in the main interface then touch on the System parameter.
The next screen will appear as screen-13.

Label out distance (1) is the distance of label dispensing board. Put the value as per the requirement as shown in the screen-13.
Manual checking of different functions:
Touch on the MANUAL icon on the operation interface, the manual checking screen will appear as screen 14.

To check the label dispensing touch on the label out (1) as shown in Screen-14.
To check the main axis rotation touch on the Spindle icon (3) as shown in Screen-14.
The current angle (2) shows the current machine position as shown in Screen-11.
To check the glue dispensing function touch on the glue dispensing ON/OFF icon (4) as shown in screen-14.
To check the booklet suck function touch on the booklet suck ON/OFF (10) as shown in Screen-14.
To check the Glue power function touch on the Glue power ON/OFF icon (8) as shown in Screen-14.
To turn the label out switch ON/OFF touch on that icon (9) as shown in Screen-14.
To make label dispensing pause ON/OFF touch on that icon (6) as shown in Screen-14.
To check the sucker disc function touch on the sucker disc test icon (5) as shown in Screen-14.
To go to the next page of manual checking mode touch on the down arrow key (7) as shown in Screen-14.
The second page of the manual checking will appear as screen-15.

Touch on the Rejection icon (1) to check the rejection mechanism of the machine as shown in screen-15.
To check the Glue dispenser touch on the icon (2) as shown in the screen-15.
To Start and to Stop the vacuum pump manually touch on the icons (3) as shown in the screen-15.
To check the vacuum formation on each sucker touch on that icons (4) as shown in the screen-15.
To check the feeding of booklet touch on the icon (5) as shown in screen-15.
To go to the next page of manual checking mode touch on the down arrow key (7) as shown in Screen-15.
The Third page of the manual checking will appear as screen-16

To check the UV detection reject touch on the ON/OFF icon (1) as shown in screen-16.
To check the Barcode 1 detection touch on the ON/OFF icon (2) as shown in screen-16.
To check the Barcode 2 detection touch on the ON/OFF icon (3) as shown in screen-16.
To check the Camera rejects touch on the ON/OFF icon (4) as shown in screen-16.
To check the Rejection verification, touch on the ON/OFF icon (5) as shown in screen-16.
To check the Label buffer touch on the ON/OFF icon (6) as shown in screen-16.
To run the machine Online touch on the ON/OFF icon (7) as shown in screen-16.
Alarm:
To view and clear if any fault alarm comes, touch on the Alarm icon in the main interface then touch on the Alarm icon.
The next screen will appear as shown in screen-17

If there will be any alarm it will display in the fault list (1) as shown in screen-17.
Read the fault and rectify and touch on the Alarm clear icon (2) as shown in screen-17.
Mechanical adjustment:
Replace the bottle transfer scroll (1) with the required scroll as per the bottle dimensions as shown in screen-18.

Replace the bottle in feed star wheel (1) with the required one as shown in screen-19

Replace the ARC guard board (1) with the required one shown in screen-20.

Replace all the pressers (1) with the required one as shown in screen-21.

Replace the bottle out feed star wheel (1) with the required one as shown in screen-22.

Set the position of glue applicator head gun as per the required position.
Adjust the Outsert in feed conveyor guide rail as per Outsert dimension and check for the proper pick up and placement.
Operation:
Turn ON the key and connect power supply. Press GREEN button to start the machine.
Challenge test shall be carried out as per frequency mentioned in BPR.
Continue the operation and perform the in-process checks as per BPR and shall be documented in BPR.
After completion of batch or to stop the machine, press BLACK button. For emergency stopping the machine in EMERGENCY, press RED EMERGENCY PUSH button.
Remove all the bottles present on conveyor from out feed star wheel to rejection bin after stoppage of machine for any reason and same shall be verified for presence of label and correct over coding details. The machine stoppages and verification to be recorded in batch record in Format.
Shutdown:
Switch “OFF” the machine.
Switch “OFF” the main power supply.
Close the compressed air valve.
REFERENCES:
Not Applicable
ANNEXURES:
| ANNEXURE NO. | TITLE OF ANNEXURE |
| Annexure-I | Labelling Machine Stoppage Format |
DISTRIBUTION:
Master Copy : Quality Assurance Department
Controlled Copy No. 01 : Head Quality Assurance
Controlled Copy No. 02 : Head Production
ABBREVIATIONS:
| No. | : | Number |
| BPR | : | Batch Packing Record |
| IPQA | : | In process quality assurance |
| SOP | : | Standard Operating Procedure |
REVISION HISTORY:
CHANGE HISTORY LOG
| Revision No. | Details of Changes | Reason for Change | Effective Date |
| 00 | New SOP | Not Applicable | To Be Written Manual |
Annexure-I
Labelling Machine Stoppage Format


