- PROCEDURE:
- Make: Bectochem
- Preliminary check:The user department personnel shall ensure that the room temperature and Relative Humidity are in acceptable limits as per the respective SOP.
- Check the cleanliness Status of Isolator.
- Ensure that the weight balance is clean and dry and close the dust tight zip main chamber and Gas tight Zip of Isolator.
- Check and ensure that the gloves are in proper position and then switch on the Isolator.
- Check the compressed air line present at back side of Isolator it should be opened before starting the operation of Isolator.
- Operation:
- Start-up ProcedurePress yellow colored “Power Reset” button present on the front panel of Isolator.
- Press ‘‘LAMP TEST button to indication of all parameters working condition the Isolator.
- Press ‘‘FAN START’’ button to start the Isolator.
- Allow to pressure reach normal operating condition (Between 15 Pa to 22 Pa) ‘’Isolator healthy’’ indication displayed and exhaust pressure (Below 100 pa).
- Note: Switch on the Isolator about 20 minutes prior to operation for initialization & to achieve the Isolator healthy condition.
- Check differential pressure on the main chamber on the sample preparation Isolator, a pressure indicator should be within the operating range (15 pa to 22 pa) record the Same.
- Open Gas tight Zip which is at LHS side of Canopy pass box. (during this operation insure, Intermediate Dust tight zip remain close).
- Expose the material/product to be weighed inside the weighing compartment with the help of necessary tools required to remove the packing.
- Perform the weighing of the material/product inside the isolator and transfer it to the appropriate glassware|/polybag.
- Collect all the waste in a polybag and with a fastener.
- Transfers the polybag containing the waste to the continuous liner port outlet, fasten the two ends of the secondary polybag and cut it from the middle of the two fastenings with the help of a pair scissors so that there is no change in the differential pressure of the Isolator.
- After weighing open the pass box door, shift the glassware to the pass box of Isolator then close Dust tight zip of pass box, wipes the glassware’s with the lint free cloth then open Gas tight Zip and take out glassware’s and other accessories from the Isolator.
- Containment Breach Mode:
- If loss of pressure is detected in chamber during operation the control system will automatically switch to “CONTAINMENT BREACH” mode for the chamber it will be indicated by glowing red colored “CONTAINMENT BREACH” indicator.
- The chamber containment breach will be illuminated.
- The Isolator healthy indication will be turned off.
- The system will remain in this mode until the cause of the pressure loss has been rectified.
- The containment breach indicator will reset automatically when correct is re-established.
- The system will revert to RUN mode.
- Cleaning:
- Dry-cleaning:
- Turn off the Isolator by using “Fan Stop” Switch(Red colored) present on Right side of main control panel.
- Cover all the openings of supply filters.
- Clean the balance with a lint free cloth and cover it polythene.
- Sprinkle the interior surface of the isolator with water using a spraying bottle.
- Finally wipe the surface is isolator and the Isolator accessories with a dry, lint free cloth.
Note: Frequency of dry cleaning is after every weighing activity inside of the Isolator
- Wet cleaning:
- Turn off the Isolator by using “Fan Stop” Switch(Red colored) present on Right side of main control panel.
- Cover all the openings of the supply filters.
- Clean the balance with a lint free cloth and cover it with polythene.
- Rotate the S.S. ball valve present on the back side of Isolator, anti clockwise to start the purified water supply.
- Clean the Isolator by using spry gun with purified water.
- Collect all the waste in catch pot.
- Rotate the S.S. ball valve clockwise to close the water supply.
- Rotate the black colored needle valve anti clockwise to open the compressed air supply.
- Dry the Isolator by using the spray gun present inside the Isolator.
- Rotate the black colored needle valve clockwise to close the compressed air supply.
Note: Frequency of wet cleaning is at the end of the working day.
- Handling of catch pot:
- The catch pot shall be filled with deactivation agent before connecting to the Isolator drain point.
- Collect the washed water into the catch pot and close the catch pot drain.
- Transfer the catch pot to the wash area and open the catch pot drain valve and dispose of the washed water into the respective container.
- Clean the entire catch pot with purified water and transfer to Isolator room.
- Precautions:
- Take most care during operation and cleaning of the Isolator so that there should not be any damage to the HEPA filter.
- Do not store anything on/in Isolator.
- Always check pressure reading on Magnehelic/Photohelic Gauges before starting work and all trippers and alarms/fault indicator are off.
- Check the power supply to the isolator prior to weighing.
- If the exhaust filter is blocked then it will be indicating by red colored “Exhaust filter blocked indicator “then replace the exhaust filter.
- In case of power failure during dispensing /sampling stop all the control functions of isolator.
- After resuming the power ,press the POWER RESET button on the control panel the system shall revert to standby mode and select the RUN mode by pressing the “FAN START “ button on the LOP.
Note: Before using the isolator. Perform the calibration of the Balance on that particular day as per SOP.
- ANNEXURES:
| ANNEXURE NO. | TITLE OF ANNEXURE |
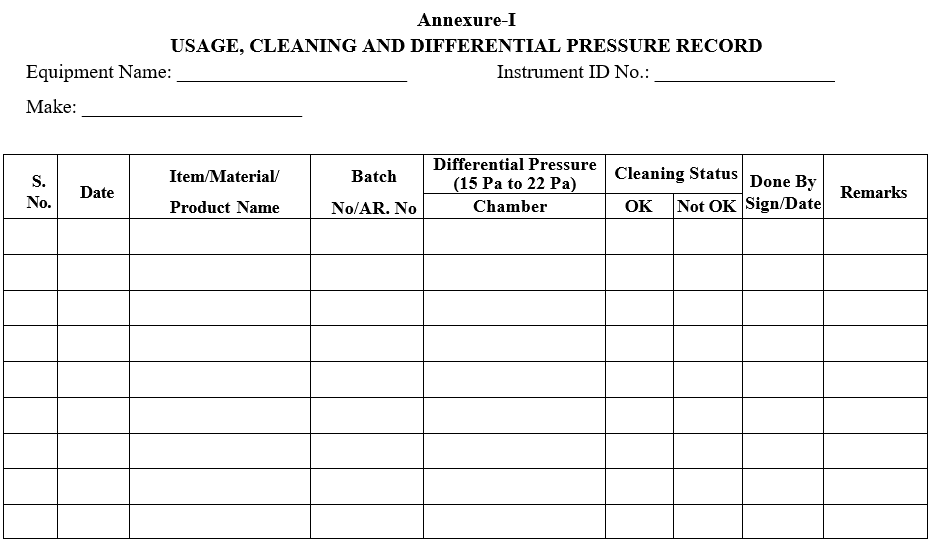
| Annexure-I | Usage, Cleaning and Differential Pressure Record. |
Annexure-I
USAGE, CLEANING AND DIFFERENTIAL PRESSURE RECORD